Core Concepts
Reference
How-to Guides
Troubleshooting
Feedback
How to set up Single Sign On (SSO)
To use SSO, you must configure both the SSO provider and Aptible with metadata related to the SAML protocol. This documentation covers the process in general terms applicable to any SSO provider. Then, it covers in detail the setup process in Okta.
Generic SSO Provider Configuration
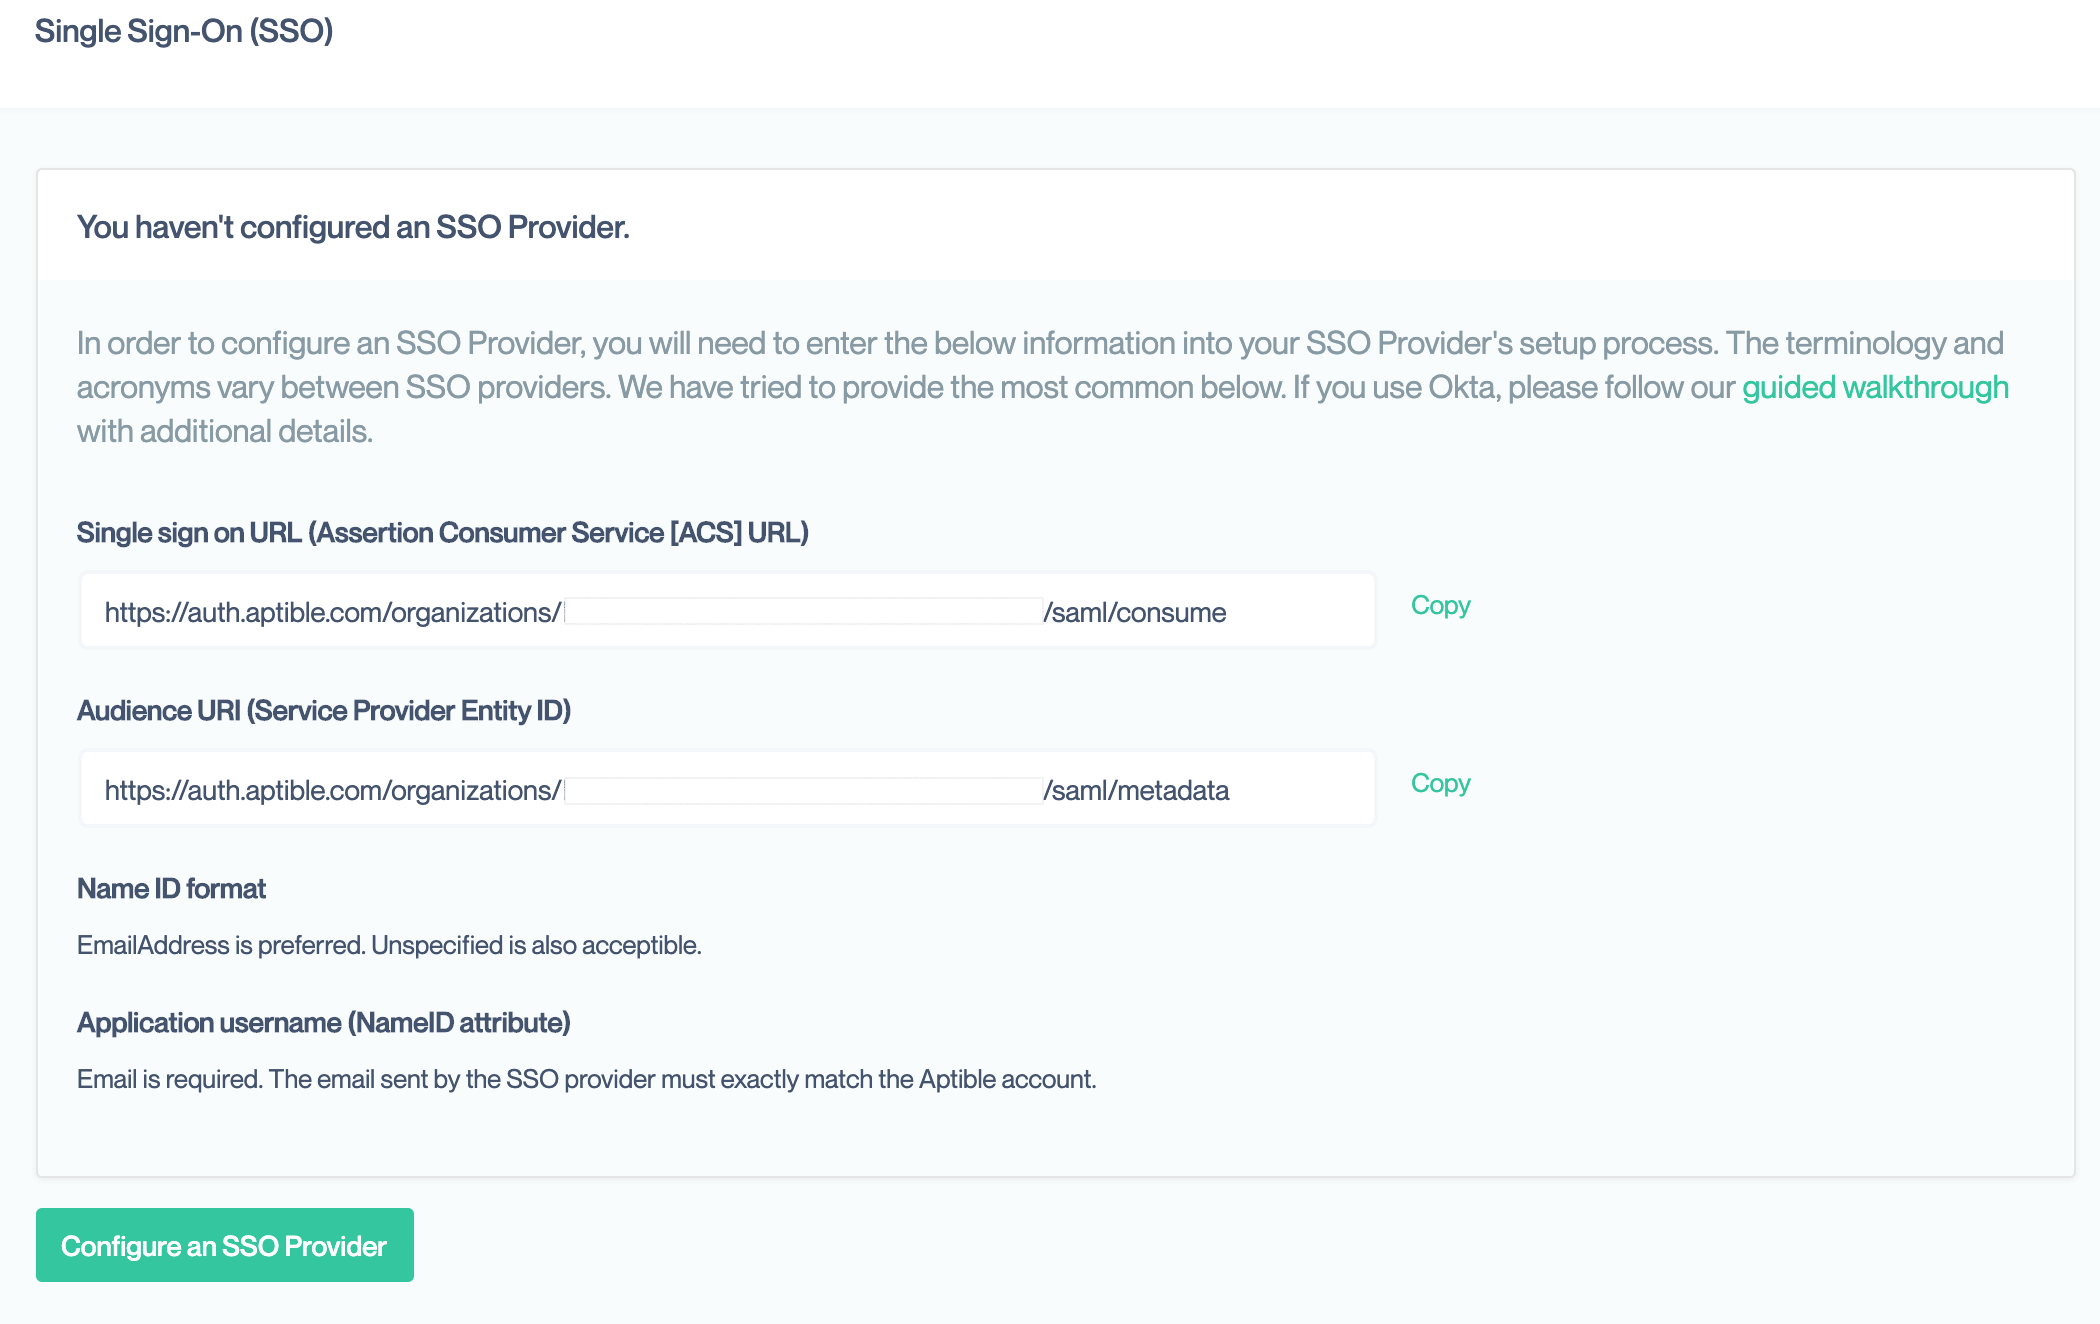
To set up the SSO provider, it needs the following four pieces of information unique to Aptible. The values for each are available in your Organization's Single Sign On the settings page, accessible only by Account Owners, if you do not yet have SSO configured.
You should reference your SSO Provider's walkthrough for setting up a SAML application alongside this documentation.
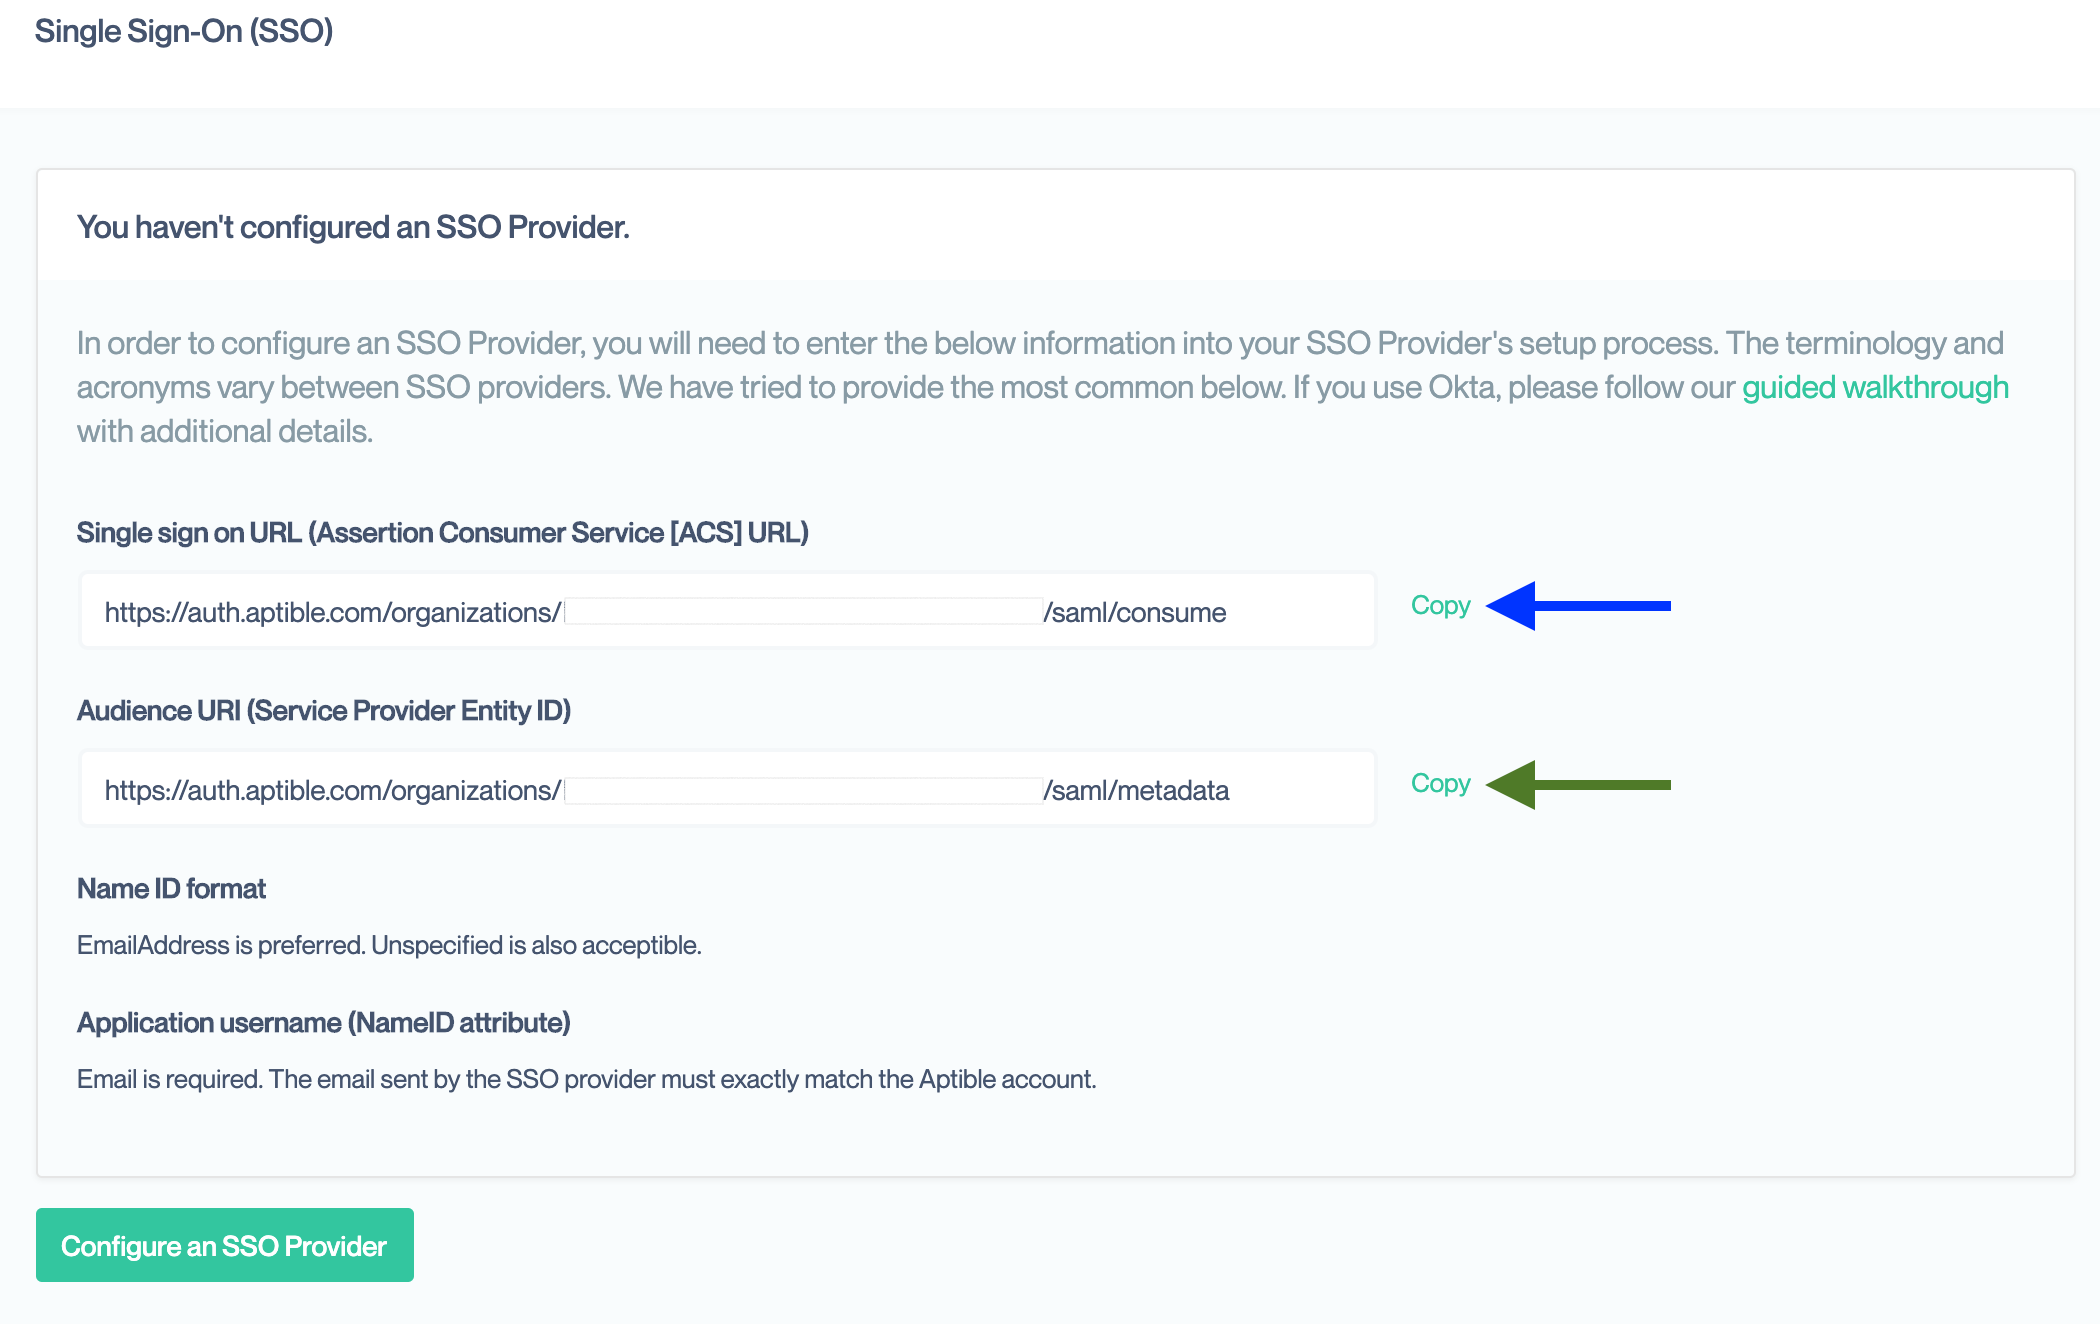
Single Sign On URL
The SAML protocol relies on a series of redirects to pass information back and forth between the SSO provider and Aptible. The SSO provider needs the Aptible URLs set ahead of time to securely complete this process. This URL is also called the Assertion Consumer Service (ACS) or SAML Consume URL by some providers.
Google uses the term SSO URL to refer to the redirect URL on their server. This value is called the ACS URL in their guide.
This is the first URL provided on the Aptible settings page. It should end in saml/consume.
Audience URI
This is a unique identifier used by the SSO provider to match incoming login requests to your specific account with them. This may also be referred to as the Service Provider (SP) Entity ID.
Google uses the term Entity ID to refer to this value in its guide.
This is the second value on the Aptible information page. It should end in saml/metadata
📘 This URL provides all the metadata needed by an SSO provider to setup SAML for your account with Aptible. If your SSO provider, has an option to use this metadata, you can provide this URL to automate setup. Neither Okta nor Google allow for setup this way.
Name ID Format
SAML requires a special "name" field that uniquely identifies the same user in both the SSO Provider and Aptible. Aptible requires that this field be the user's email address. That is how users are uniquely identified in our system.
There are several standard formats for this field. If your SSO supports the EmailAddress, emailAddress, or Email formats, one of which should be selected. If not, the Unspecified format, should be used. If none of those are available, Persistent format is also acceptable.
Some SSO providers do not require manual setting of the Name ID format and will automatically assign one based on the attribute selected in the next step.
Application Attribute or Name ID Attribute
This tells the SSO provider want information to include as the required Name ID. The information it stores about your users is generally called attributes but may also be called fields or other names. This must be set so that is the same email address as used on the Aptible account. Most SSO providers have an email attribute that can be selected here. If not, you may have to create a custom attribute in your SSO provider.
You may optionally configure the SSO provider to send additional attributes, such as the user's full name. Aptible currently ignores any additional attributes sent.
❗️ Warning
If the email address sent by the SSO provider does not exactly match the email address associated with their Aptible account, the user will not be able to login via your SSO provider. If users are having issues logging in, you should confirm those email addresses match.
Other configuration fields
Your SSO provider may have many other configuration fields. You should be able to leave these at their default settings. We provide some general guidance if you do want to customize your settings. However, your SSO provider's documentation should supersede any information here as these values can vary from provider to provider.
- Default RelayState or Start URL: This allows you to set a default page on Aptible that your users will be taken to when logging in. We direct the user to the product they were using when they started logging in. You can override that behavior here if you want them to always start on a particular product.
- Encryption, Signature, Digest Algorithms: Prefer options with
SHA-256over those withSHA-1.
Aptible SSO Configuration
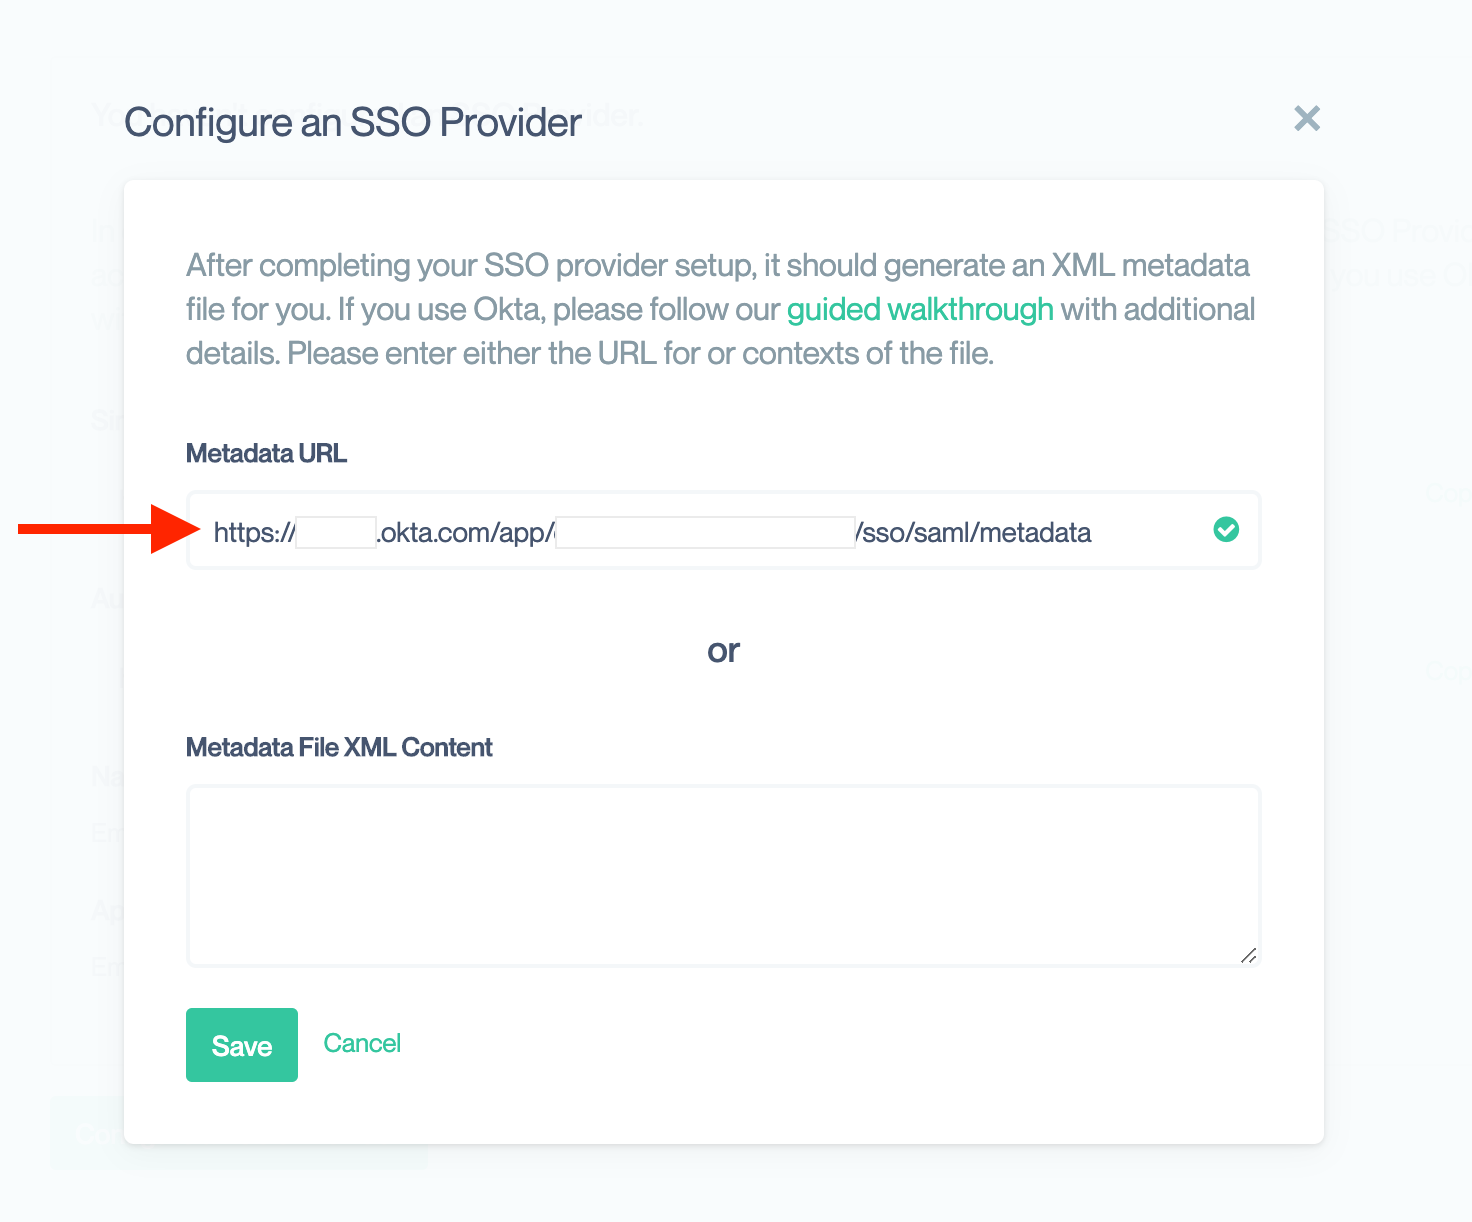
Once your have completed the SSO provider configuration, they should provide you with XML Metadata either as a URL or via file download.
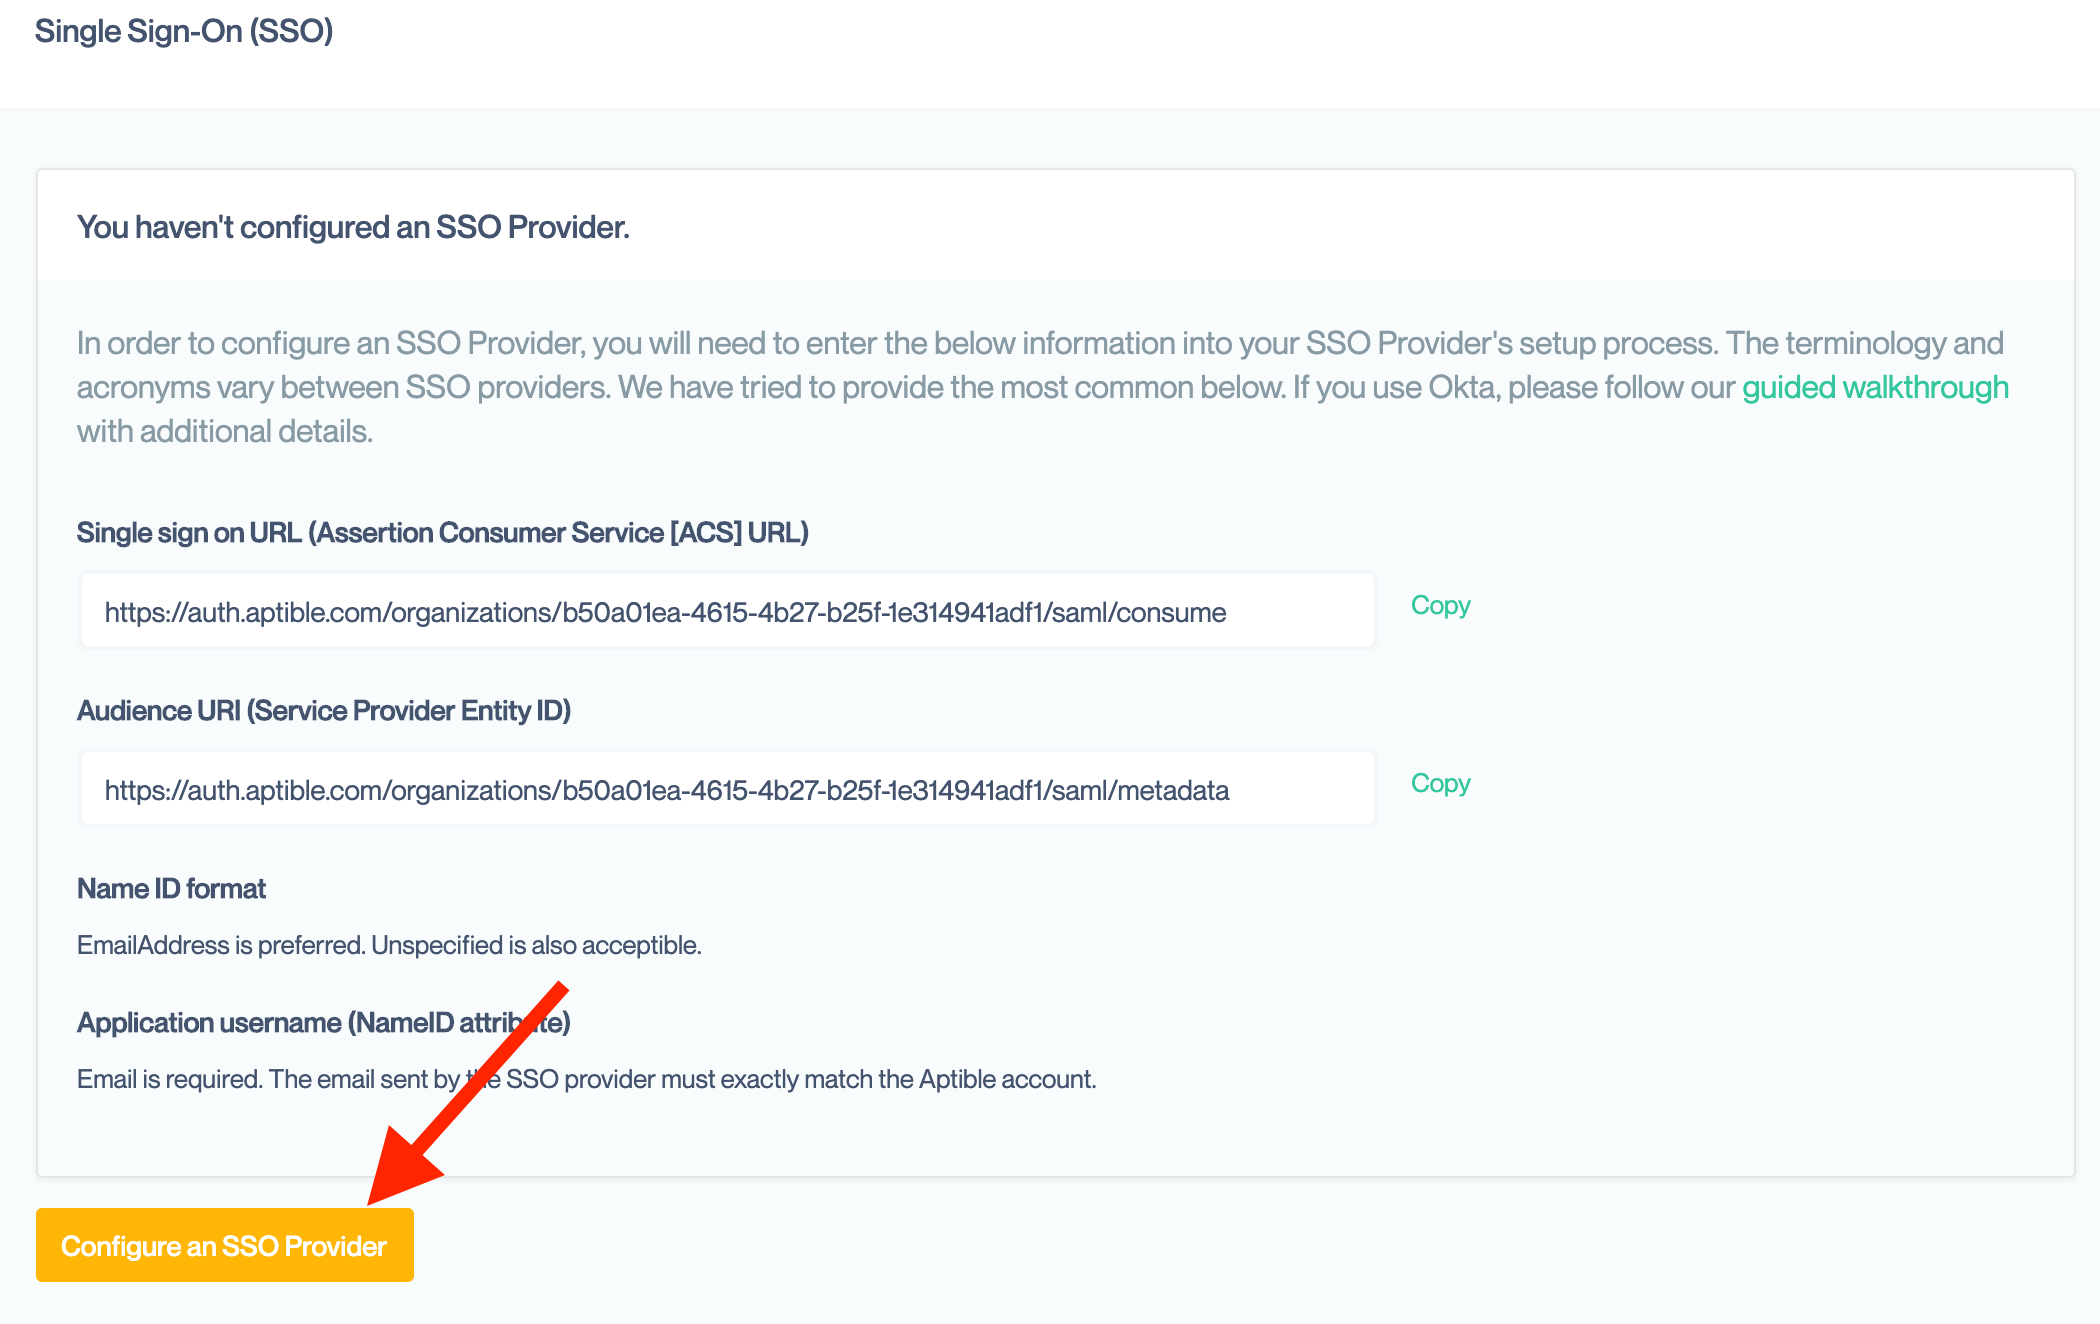
Return to the Single Sign On settings page for your Organization, where you copied the values for setting up your SSO provider. Then click on the "Configure an SSO Provider"
In the resulting modal box, enter either the URL or the XML contents of the file. You only need to enter one. If you enter both, Aptible will use the URL to retrieve the metadata. Aptible will then complete our setup automatically.
📘 Note
Aptible only supports SSO configurations with a single certificate at this time. If you get an error when applying your configuration, check to see if it contains multiple KeyDescriptor elements. If you require multiple certificates please notify Aptible Support.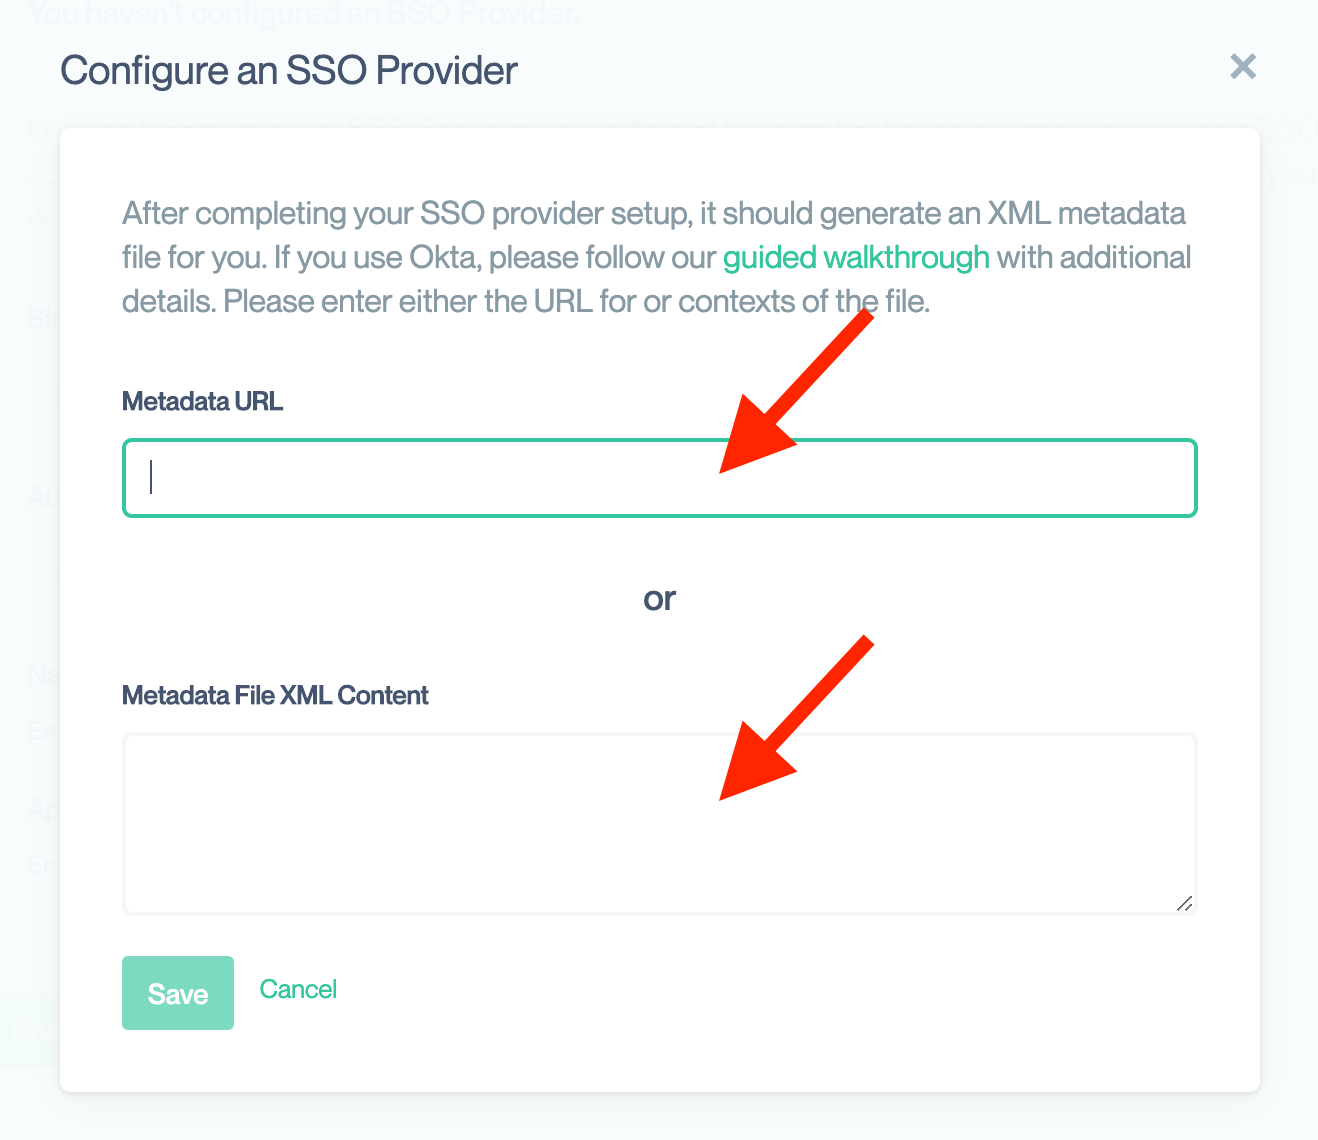
❗️ Warning
When you retrieve the metadata, you should ensure the SSO provider's site is an HTTPS site. This ensure that the metadata is not tampered with during download. If an attacker could alter that metadata, they could substitute their own information and hi-jack your SSO configuration.
Once processing is complete, you should see data from your SSO provider. You can confirm these with the SSO provider's website to ensure they are correct.
You can optionally enable additional SSO feature within Aptible at this point:
Okta Walkthrough
As a complement to the generic guide, we will present a detailed walkthrough for configuring Okta as an SSO provider to an Aptible Organization.
Sign in to Okta with an admin account
- Click Applications in the main menu.
- Click Add Application and then Create New App.
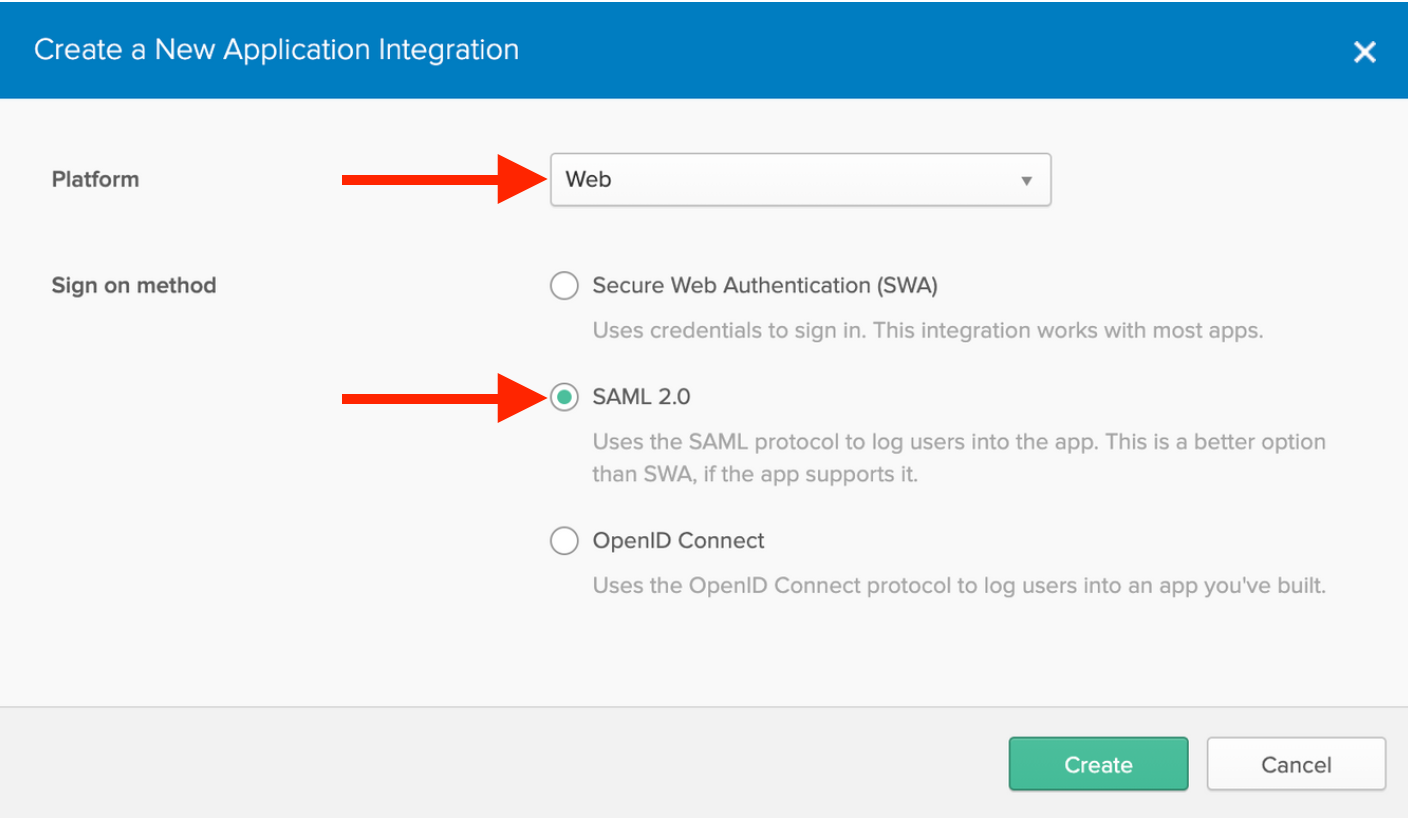
Setup a Web application with SAML 2.0
- The default platform should be Web. If not, select that option.
- Select SAML 2.0 as the Sign on method.
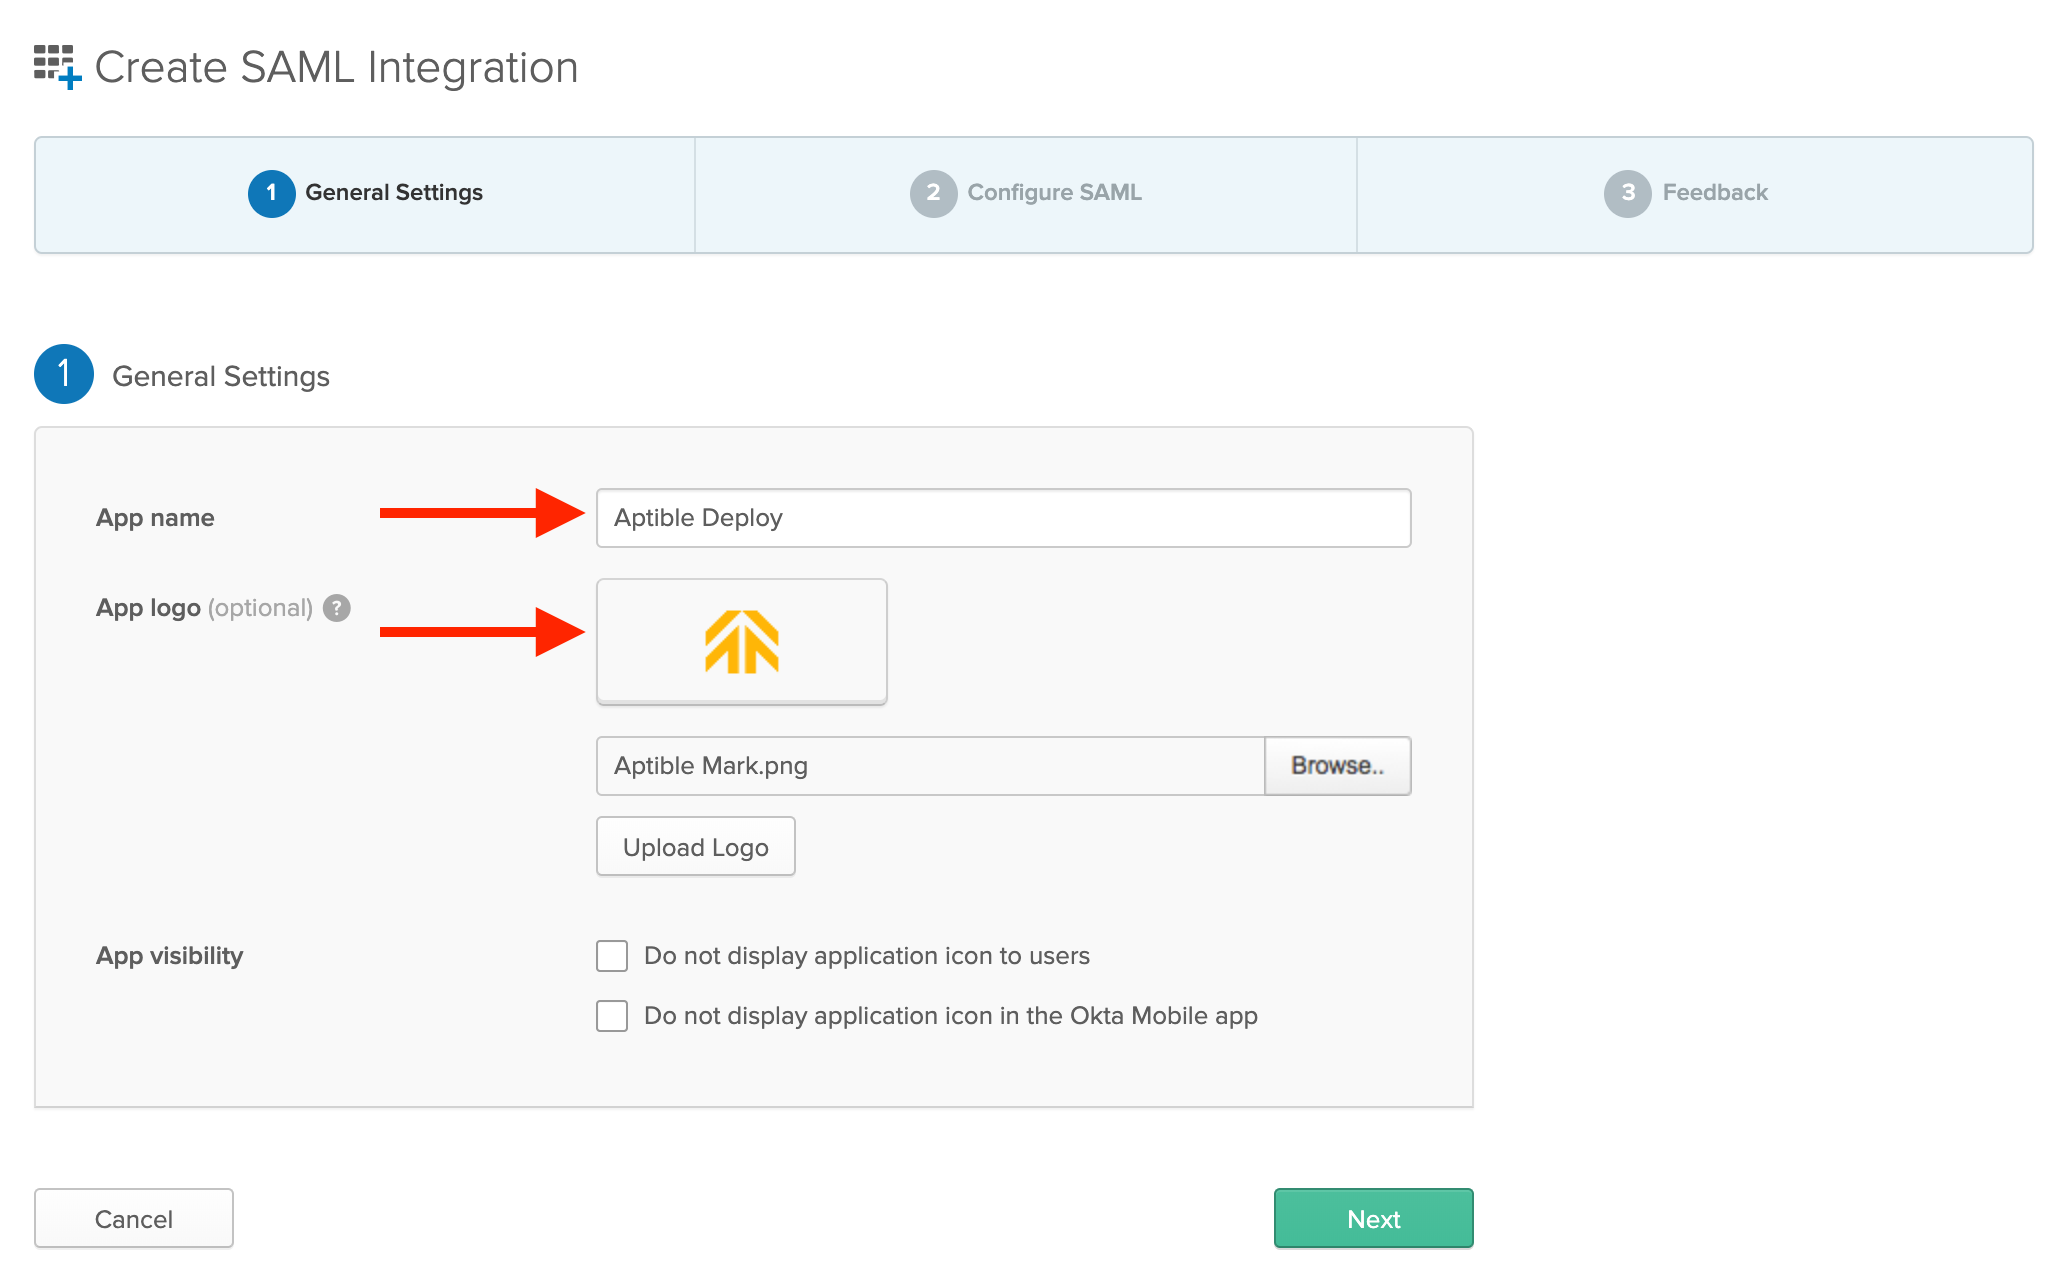
Create SAML Integration
- Enter
Aptible Deployor another name of your choice. - You may download and use our logo for an image.
Enter SAML Settings from Aptible Single Sign On Settings Page
- Open the Organization settings in Aptible Dashboard
- Select the Single Sign On settings in the sidebar
- Copy and paste the Single Sign On URL
- Copy and paste the Audience URI
- Select
EmailAddressfor the Name ID format dropdown - Select
Emailin the Application username dropdown - Leave all other values as their defaults
- Click Next

Fill-in Okta's Feedback Page
- Okta will prompt you for feedback on the SAML setup.
- Select "I'm an Okta customer adding an internal app"
- Optionally, provide additional feedback.
- When complete, click Finish.

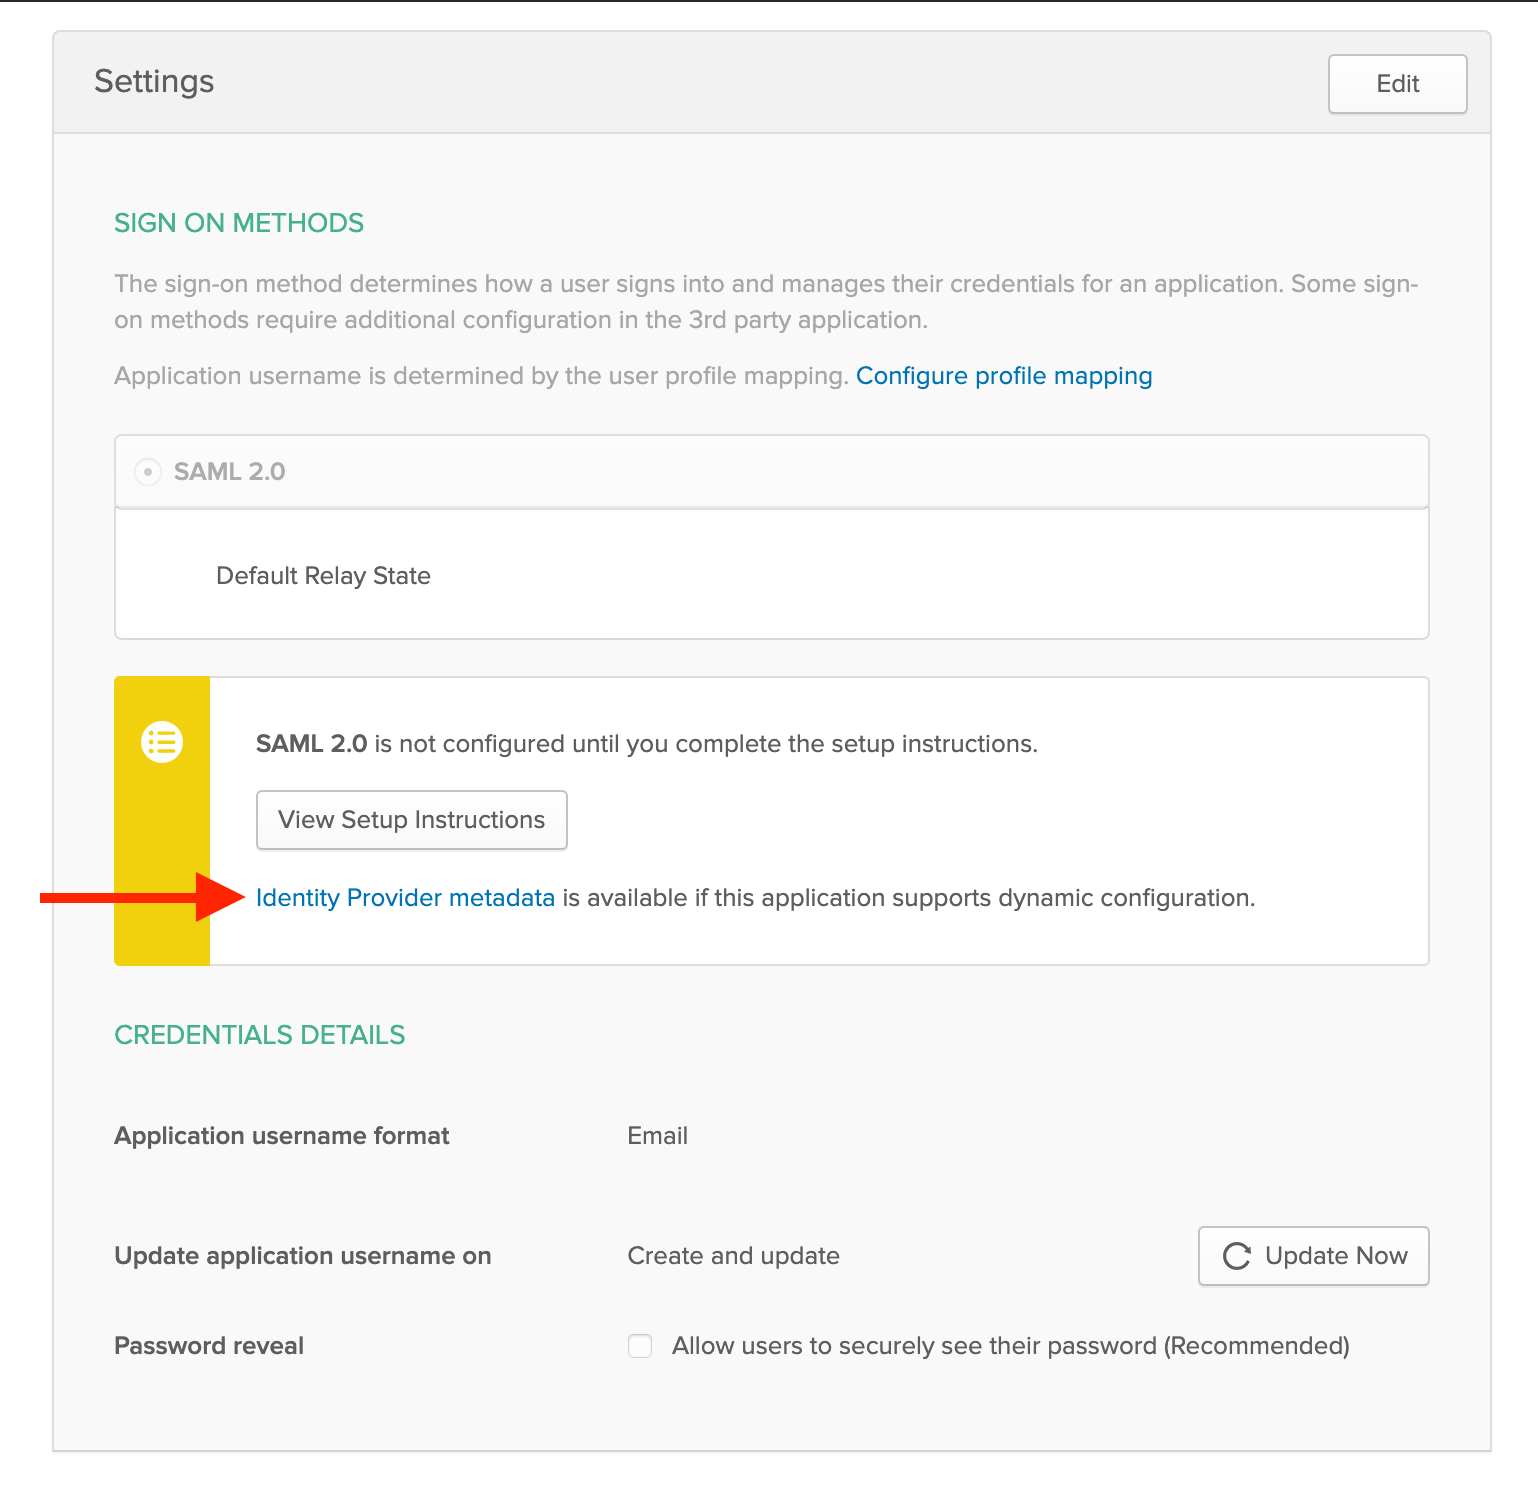
Copy URL for Identity Provider metadata
- Copy the link for Identity Provider metadata
Enter metadata URL in Aptible SSO Settings
- Open the Single Sign On settings page for your Organization in Aptible
- Click "Configure an SSO Provider"
- Paste the metadata URL into the box
Assign Users to Aptible Deploy
- Follow Okta's guide to assign users to the new application.
Frequently Asked Questions
What happens if my SSO provider suffers downtime?
Users can continue to use their Aptible credentials to login even after SSO is enabled. If you also enabled SSO enforcement then your Account Owners can still login with their Aptible credentials and disable enforcement until the SSO provider is back online.
Does Aptible offer automated provisioning of SSO users?
We do not at this time. If this would be helpful for your Organization, please let us know.
Does Aptible support Single Logout?
We do not at this time. If this would be helpful for your Organization, please let us know.
How can I learn more about SAML?
There are many good references available on the Internet. We suggest the following starting points:
How to set up Single Sign On (SSO)
- Generic SSO Provider Configuration
- Single Sign On URL
- Audience URI
- Name ID Format
- Application Attribute or Name ID Attribute
- Other configuration fields
- Aptible SSO Configuration
- Okta Walkthrough
- Sign in to Okta with an admin account
- Setup a Web application with SAML 2.0
- Create SAML Integration
- Enter SAML Settings from Aptible Single Sign On Settings Page
- Fill-in Okta's Feedback Page
- Copy URL for Identity Provider metadata
- Enter metadata URL in Aptible SSO Settings
- Assign Users to Aptible Deploy
- Frequently Asked Questions